How to update the VA Mobile doc site
If you are comfortable with maintaining and troubleshooting setup on your local machine, feel free to skip down to the section with instructions for editing the doc site locally. If you're looking for a simpler option, use the codespaces workflow here at the top.
Updating the site using codespaces
Follow these steps each time you want to make an update to the VA Mobile doc site via codespaces (here's the github documentation for codespaces, which get you "up and coding faster with fully configured, secure cloud development environments native to GitHub.")
You need:
- A browser
- Access to the mobile app repo
1. Create a new branch to edit pages & make your changes
Go to the mobile repo branches page, and tap the green "New Branch" button near the top righthand corner of the page.
Type a branch name for your branch following this pattern: doc, then your initials, then what you're updating, all separated by dashes. (Ex: doc-tkd-codespaces-addition).
Keep the default source selection of develop, and tap "Create new branch".
The branch that's created will appear in the middle of the page, as the first branch listed in the "Your branches" section. Tap on the blue URL branch name to be brought to the home page of your branch.
Now you have a place where you can make edits to the doc site!
2. Launch a codespace for your branch
You can use codespaces to make changes, and see them rendered on a preview version of the doc site, so let's get a codespace running for your branch.
Tap on the green "Code" dropdown button near the top righthand corner of your branch's homepage.
- If you don't have any codespaces, you can use the big green button to make a new one.
- If you have a codespace (on any branch), and need a new one for this branch, you can use the "+" button to make a new one.
- If you have a codespace for this branch that you'd like to jump back into, you can tap on the codespace name (a randomly generated phrase, like "silver guppies" or "friendly meme")
This will launch a new tab in your browser, and the codespace will automatically start setting itself up. Give it a minute to fully load.
Now you’re ready to start making edits to the doc site!
3. Open the repository in the codespace, and make your changes
Codespaces automatically run a version of VS Code (Visual Studio Code). You'll need to open up the folders where the doc site lives, to create new pages or edit existing ones.
In the EXPLORER on the lefthand side, tap to expand the folders: "VAMobile", then "documentation", then "docs". The folders at this level are the sections of the doc site, so navigate from here to the md file(s) where you want to make your changes.
Create or edit the files you need, then use CTRL+S to save each one.
4. Preview the changes you've made to the doc site
Codespaces automatically set up a preview version of the doc site when it launched, but that won't have the changes you've made. You'll need to launch a new preview doc site, to review changes you've made & saved.
Select the "Terminal" tab from the tabs in the ~bottom third of your screen, then the "+" button to the far right (still in that bottom third) to open a new Terminal. Wait ~5 seconds for the new terminal to get up and running.
- In the terminal, change to the location of the documentation site by typing (or copy-pasting) this, then tapping Enter: cd VAMobile/documentation
- Then, launch a new doc site by typing this command, then tapping Enter: yarn start
It's going to give you a warning that something is already running on port 300 (that's the preview doc site WITHOUT your changes that codespaces set up automatically). Go ahead and type "y" in response to the question about running it on another port.
This opens up a new tab, and starts loading your preview version of the doc site.
The page that initially loads will always look broken - don't panic! It's because codespaces is jumping you to a junk URL that doesn't exist, not an actual problem. Go ahead and use the header to navigate to the pages you've made/edited, and review them.
If you want to make further changes, you can switch back to the tab with your open codespace, and then repeat steps 3 & 4 (using the 'refresh' button on your preview doc site to get new changes as you make them).
5. Stage, commit and sync your doc site changes
When you're finished with your changes, you'll need to get the changes off of the codespace, and back to your branch in github.
Go to the Source Control page, by tapping on the Merge icon with the blue '#' notification icon on it, along the far lefthand side of the screen.
It will include a list of all of the files you've changed - review that to make sure that all of the files you expect are in there. Press the "+" button in the row with each file's name, to stage the change (staging is a fancy way to say "mark as a file you want to commit")
Type a note about the changes you're making in the text box at the top of the source control area (with the preview text in it that starts with 'Message'), then tap the green "Commit" button (this commits all of the files you've staged, to the version of your branch that lives in this codespace. Yes, this is a lot of steps, but generally the point is to make it difficult to accidentally get code off of/out of your machine.)
Finally, you'll tap the green "Sync" button (that has replaced the green commit button) to sync the changes from the codespace, to your branch in github. This can take a minute or longer.
6. PR things
Skip down to the shared documentation section about how to create and merge a pull request with your changes, and follow those instructions.
Get ready for those instructions by pulling up the mobile app repo home in your browser: https://github.com/department-of-veterans-affairs/va-mobile-app.
Updating the site from your local machine
Follow these steps each time you want to make an update to the VA Mobile doc site.
You need:
- A folder on your computer where you’re making changes to markdown (.md) files (open in Finder)
- GitHub Desktop
- A text editor (like Sublime text)
- Terminal/Command Line
- A browser
- Access to the mobile app repo
1. Get the latest version of the live doc site to work from
To get the latest version, open** GitHub Desktop**. Make sure the current repository says “va-mobile-app” and the current branch is set to “develop.” Click “Pull/Fetch origin” to get the latest version of the site.

2. Create a new branch to edit pages & make your changes
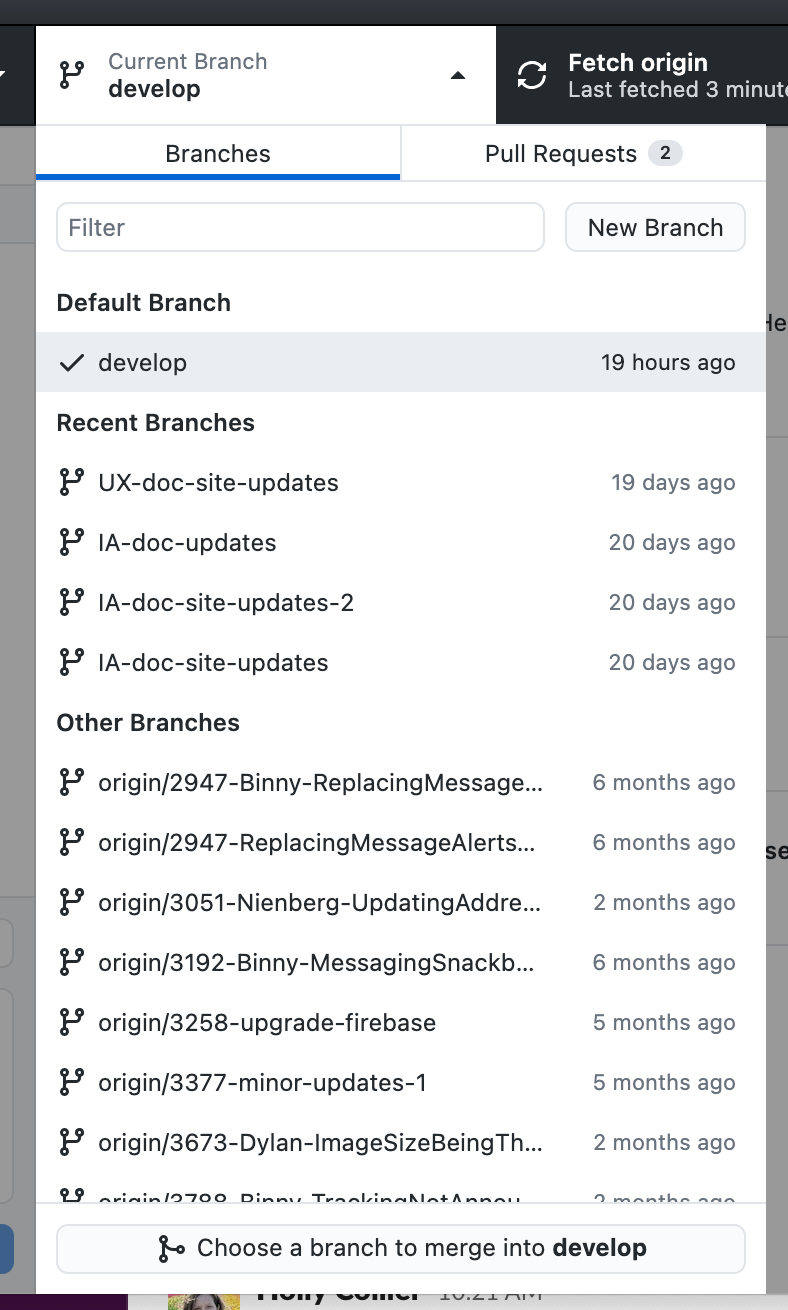
(Do not work directly in develop). Open the current branch menu and choose the “new branch” button option.
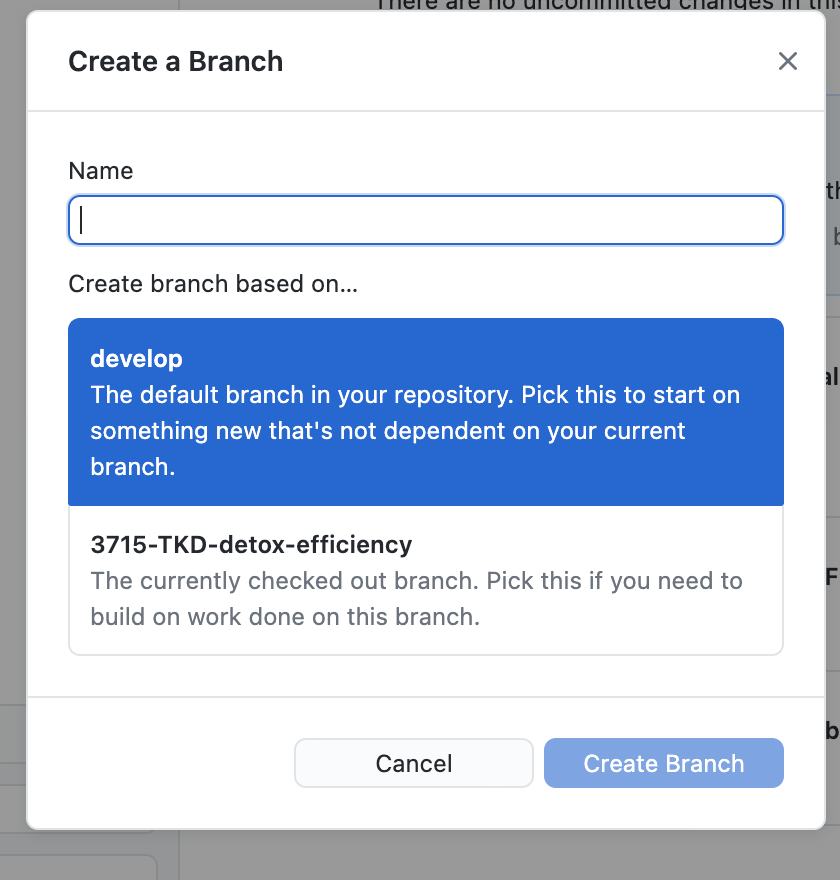
Give the new branch a unique name. Make sure it’s based on the develop branch & then click “Create branch”.
The current branch should now show the name of the branch you created:

Now you have a place where you can make edits to the doc site!
3. Get set up to view changes to your local copy of the doc site in a browser
To be able to see the changes you’re going to make to md files rendered in a browser, you need to run the local version of the doc site on your computer.
First, open Terminal/Command Line.
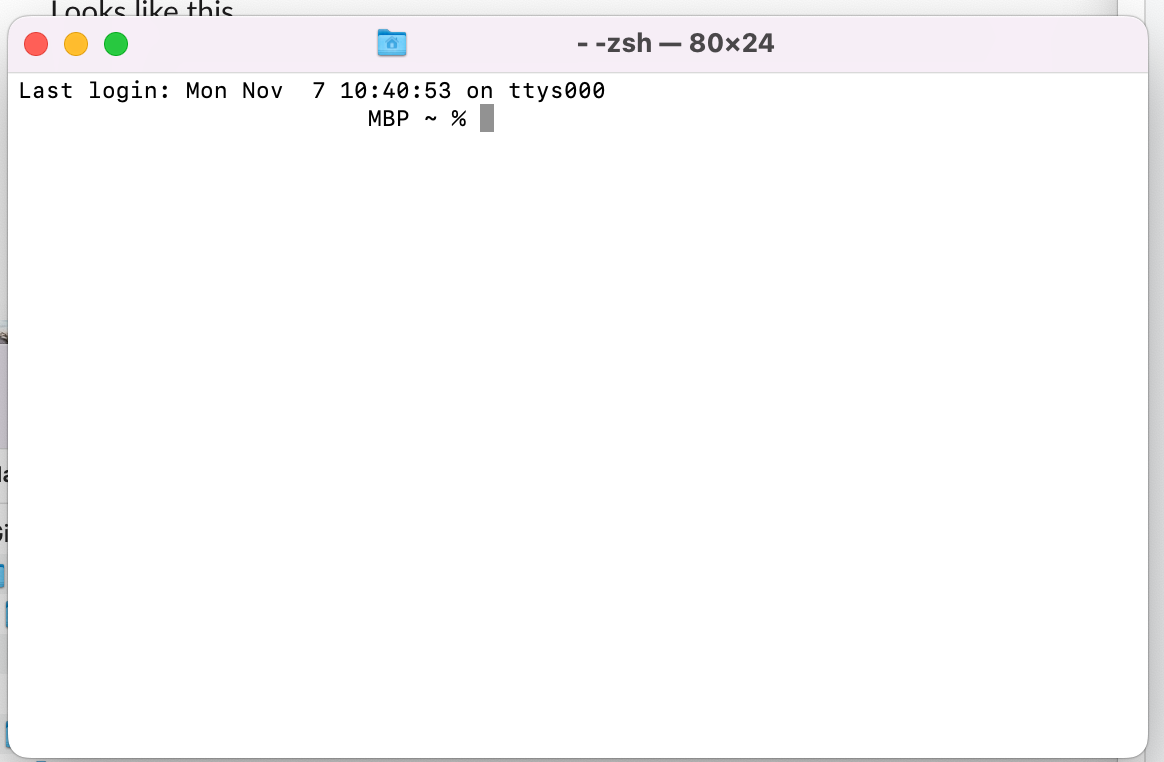
Then use the Finder to navigate to the folder where the doc site is on your machine: somefolderonyourcomputer/VAMobile/documentation

Back in Terminal/Command Line, type cd and then a space, then drag and drop the somefolderonyourcomputer/VAMobile/documentation folder from the finder into Terminal/Command Line. It will look like this:
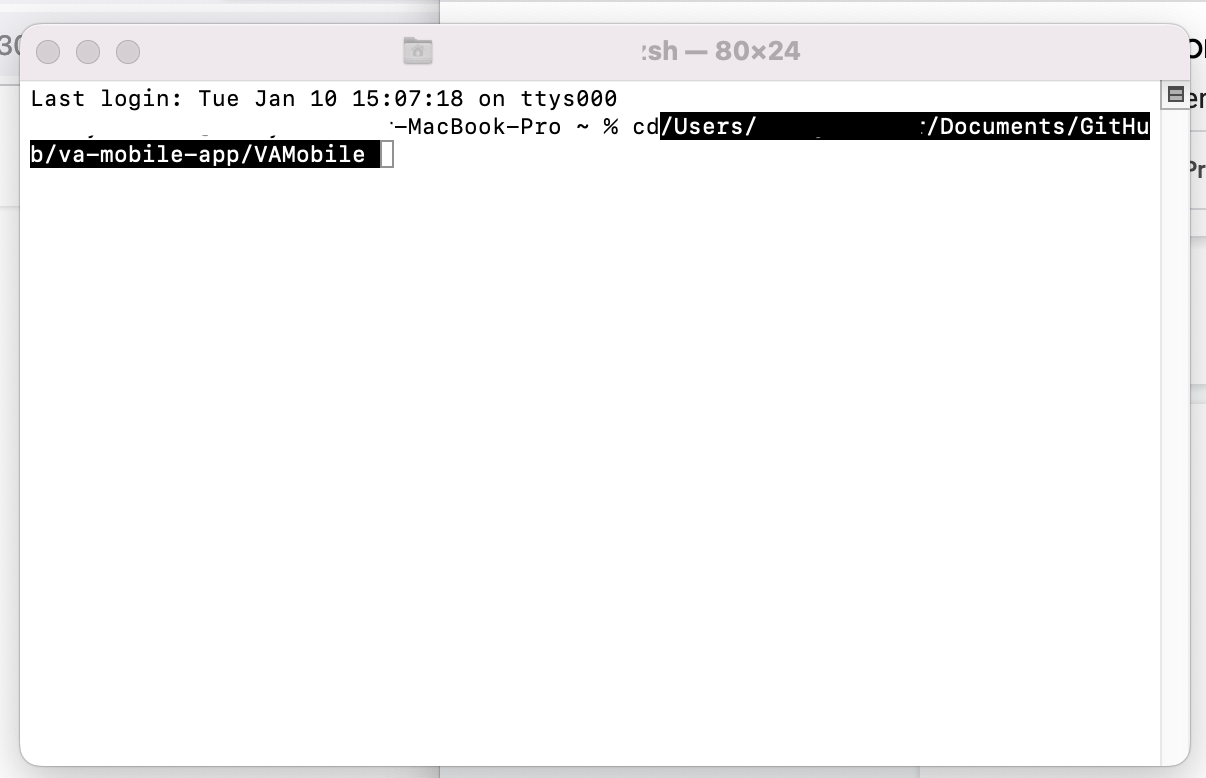
Hit enter. Then type yarn start and hit enter again. It will then do this:
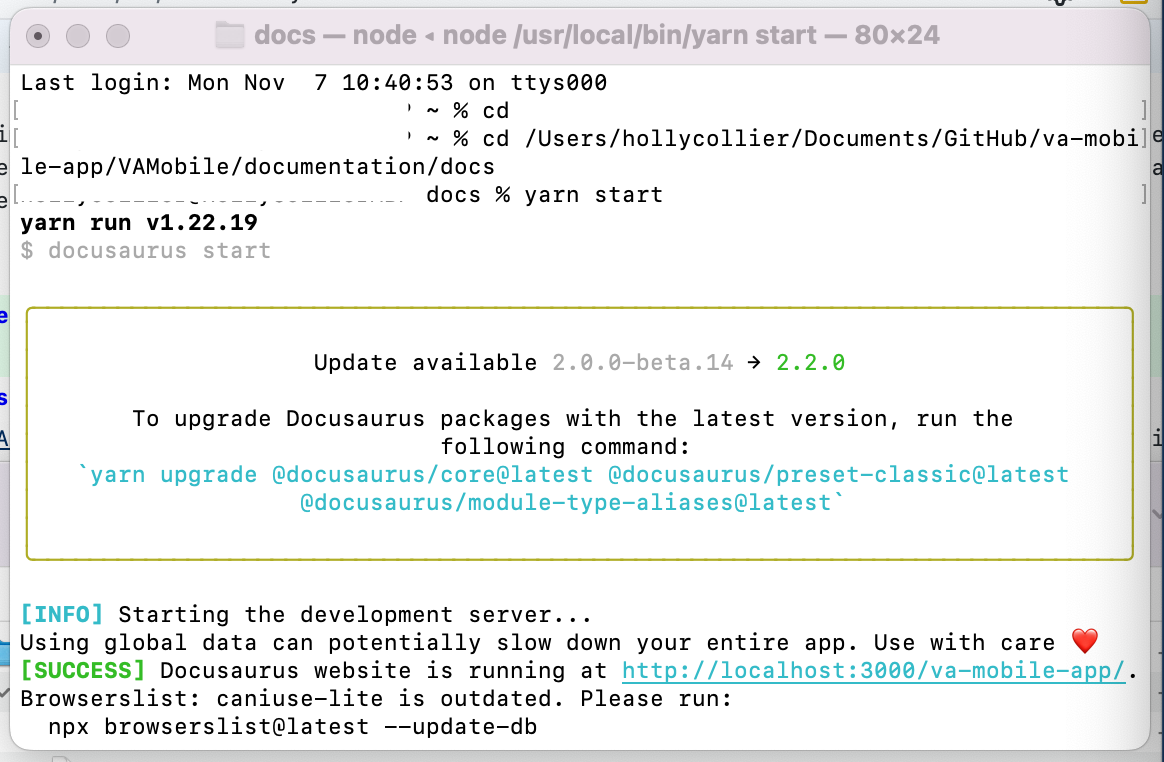
It will also automatically open a new browser window where changes to your files will be rendered (if you see an alert, give it permission to open your browser). The URL bar for that new window will look like this:
Now you’re ready to start making edits to the doc site!
4. Open the repository in your text editor to edit, create new and save md pages
- To create a new md page: Open the Doc site folder within your text editor and choose “New File”. The new page will open in the text editor.
- To edit an existing md page: Open the Doc site folder within your text editor & select the file you want to edit. The page will open in the text editor.
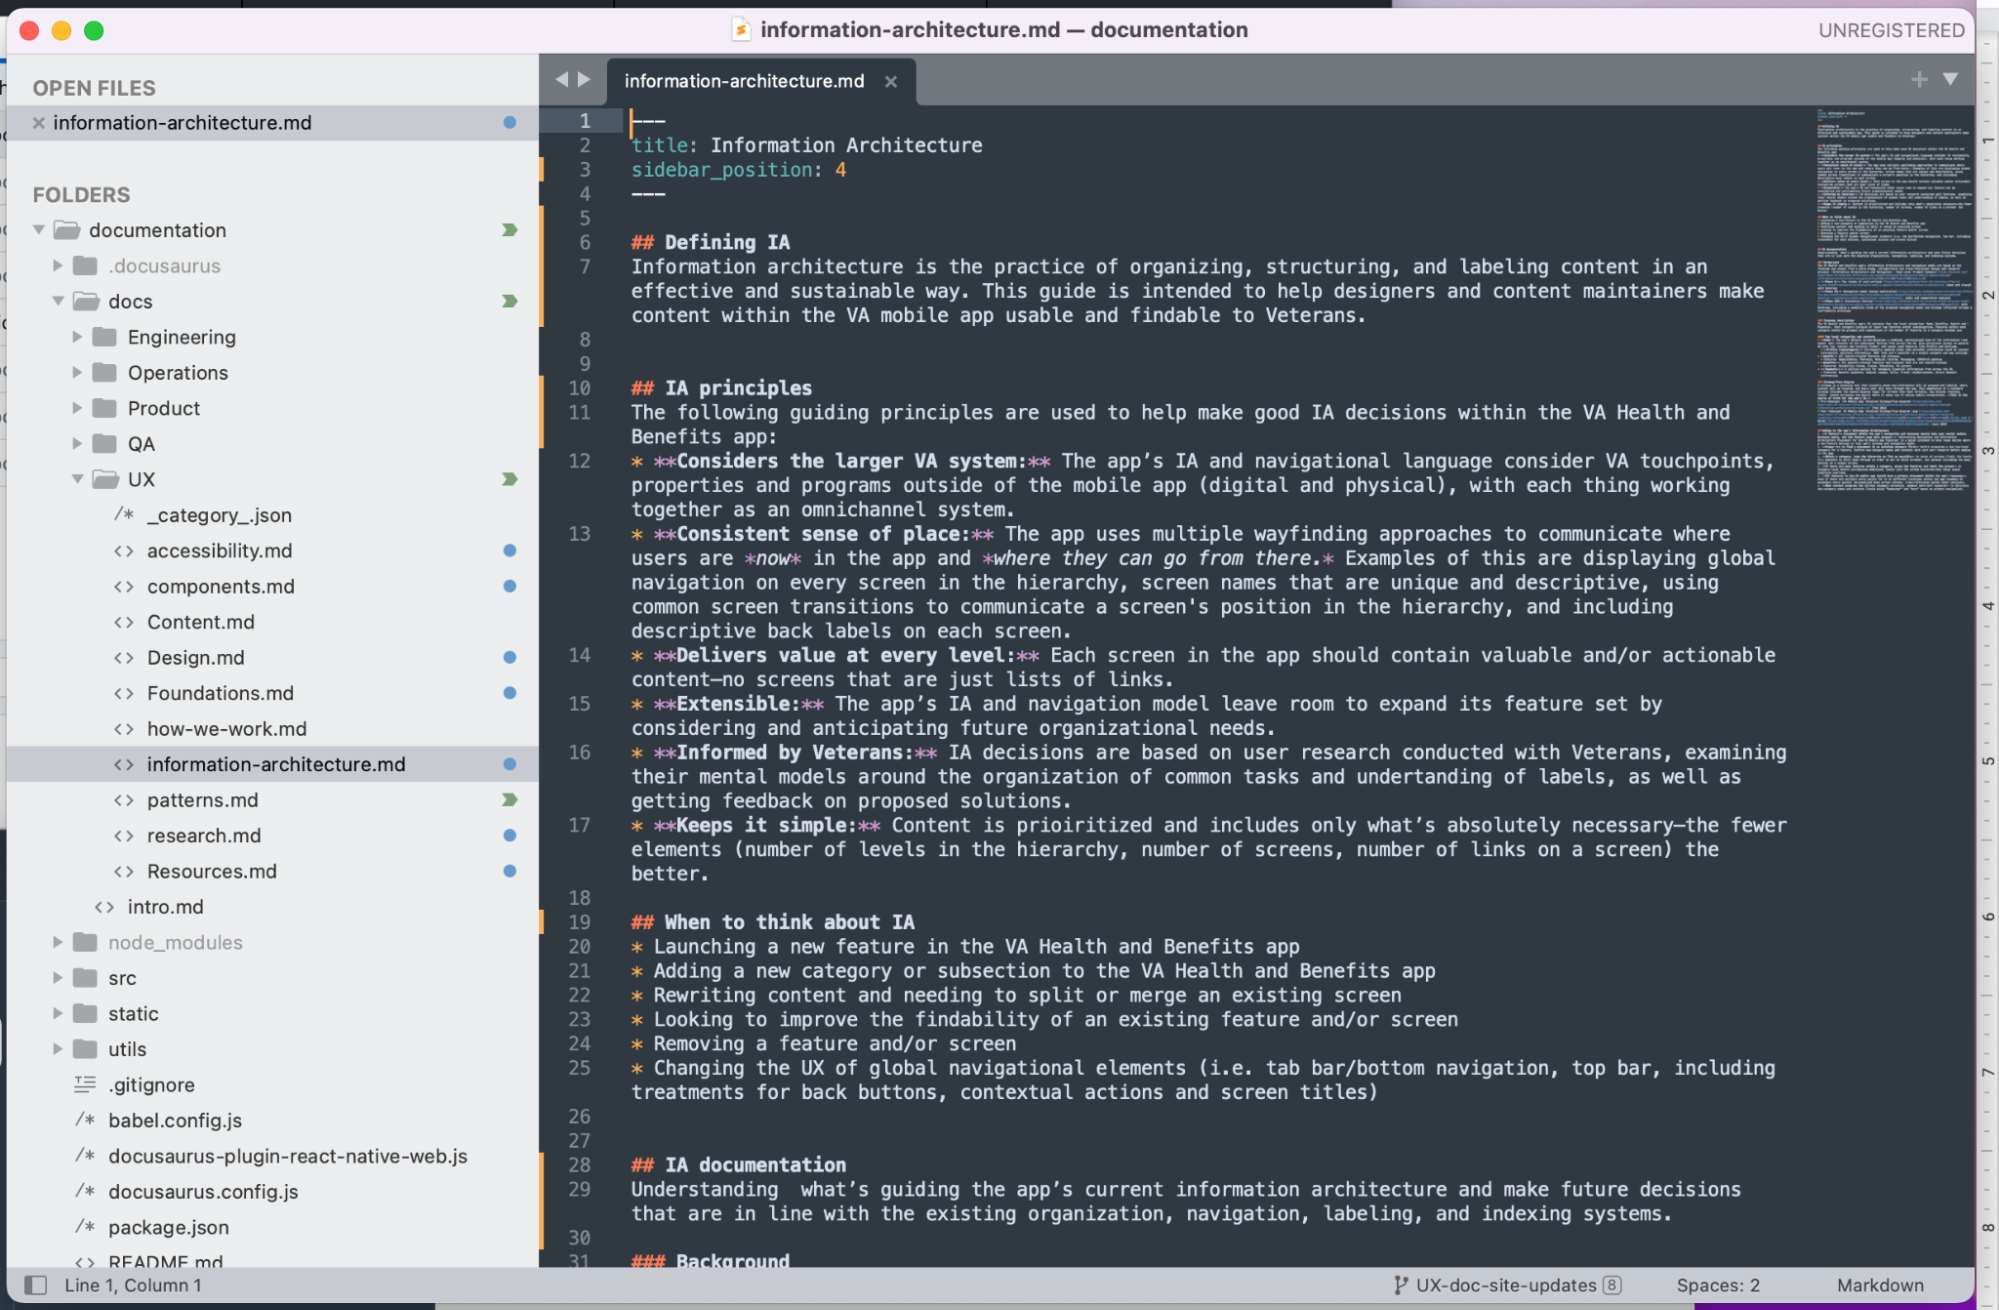
Edit the md file and save it, then switch to your browser window to view the changes rendered onscreen. Review updates in your browser as you go to make sure everything looks as you expect.
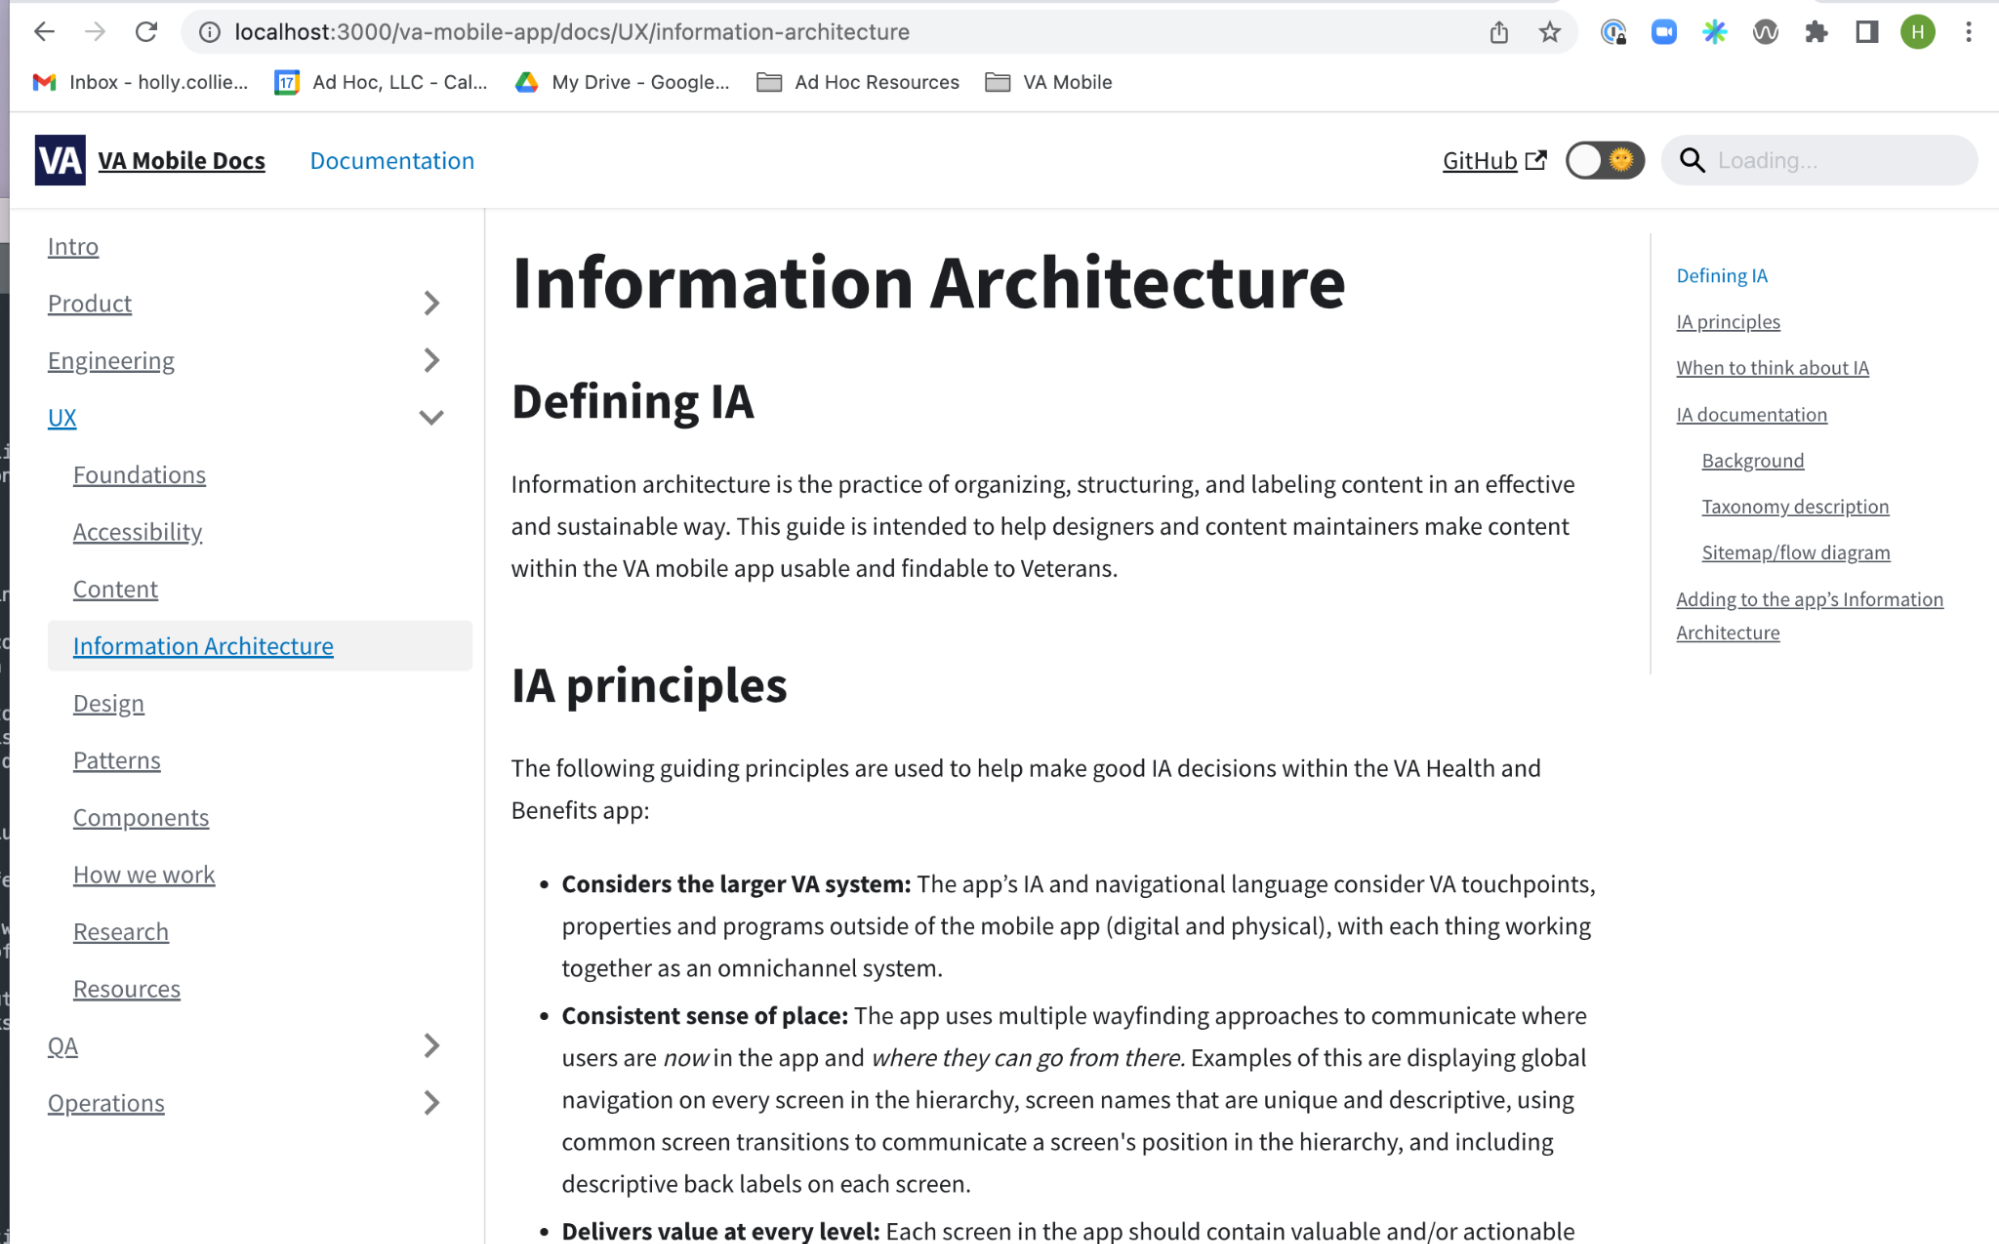
Once you’re happy with all of your edits, it’s time to build the site & submit your changes!
5. Build the doc site locally to review changes before publishing
Once you are done editing you need to build the site. This step generates a static version of the site, which is the same as how it is served on the live Doc site. It should look the same as the development environment you have been running.
First, stop/kill the dev site. To do this, go to Terminal/Command Line and type in
CTRL + C to stop/kill the dev site.
Next, you’re going to build the site. In Terminal/Command Line, type in yarn build and press enter.
The site will build and display any errors it finds. Check and make sure everything looks good. Note that if you make changes you will have to run build again to see them, unlike with the development server which auto updates for faster development.
If you’d like someone else to review your branch before publishing them, you should commit your changes and publish your branch following the steps below, but don’t create a pull request.
6. Publish your changes to the live doc site
To push your changes to the live Doc site, you first need to check your changes, and get those changes approved by someone else on the team. You can do this by publishing the changes & creating a pull request.
Commit changes
First, open GitHub Desktop. It will show all of the pages you changed in the Changes tab on the left. If you click on a file, you can see the set of changes for each file (called a diff). Green indicates a line was added. Red indicates the line was deleted.
Make sure only the boxes next to the pages you want to update are checked. At the bottom of that column, write a summary of the changes you made (in case someone needs to review the history and can easily tell what you were up to) and then click “Commit” to save the changes.
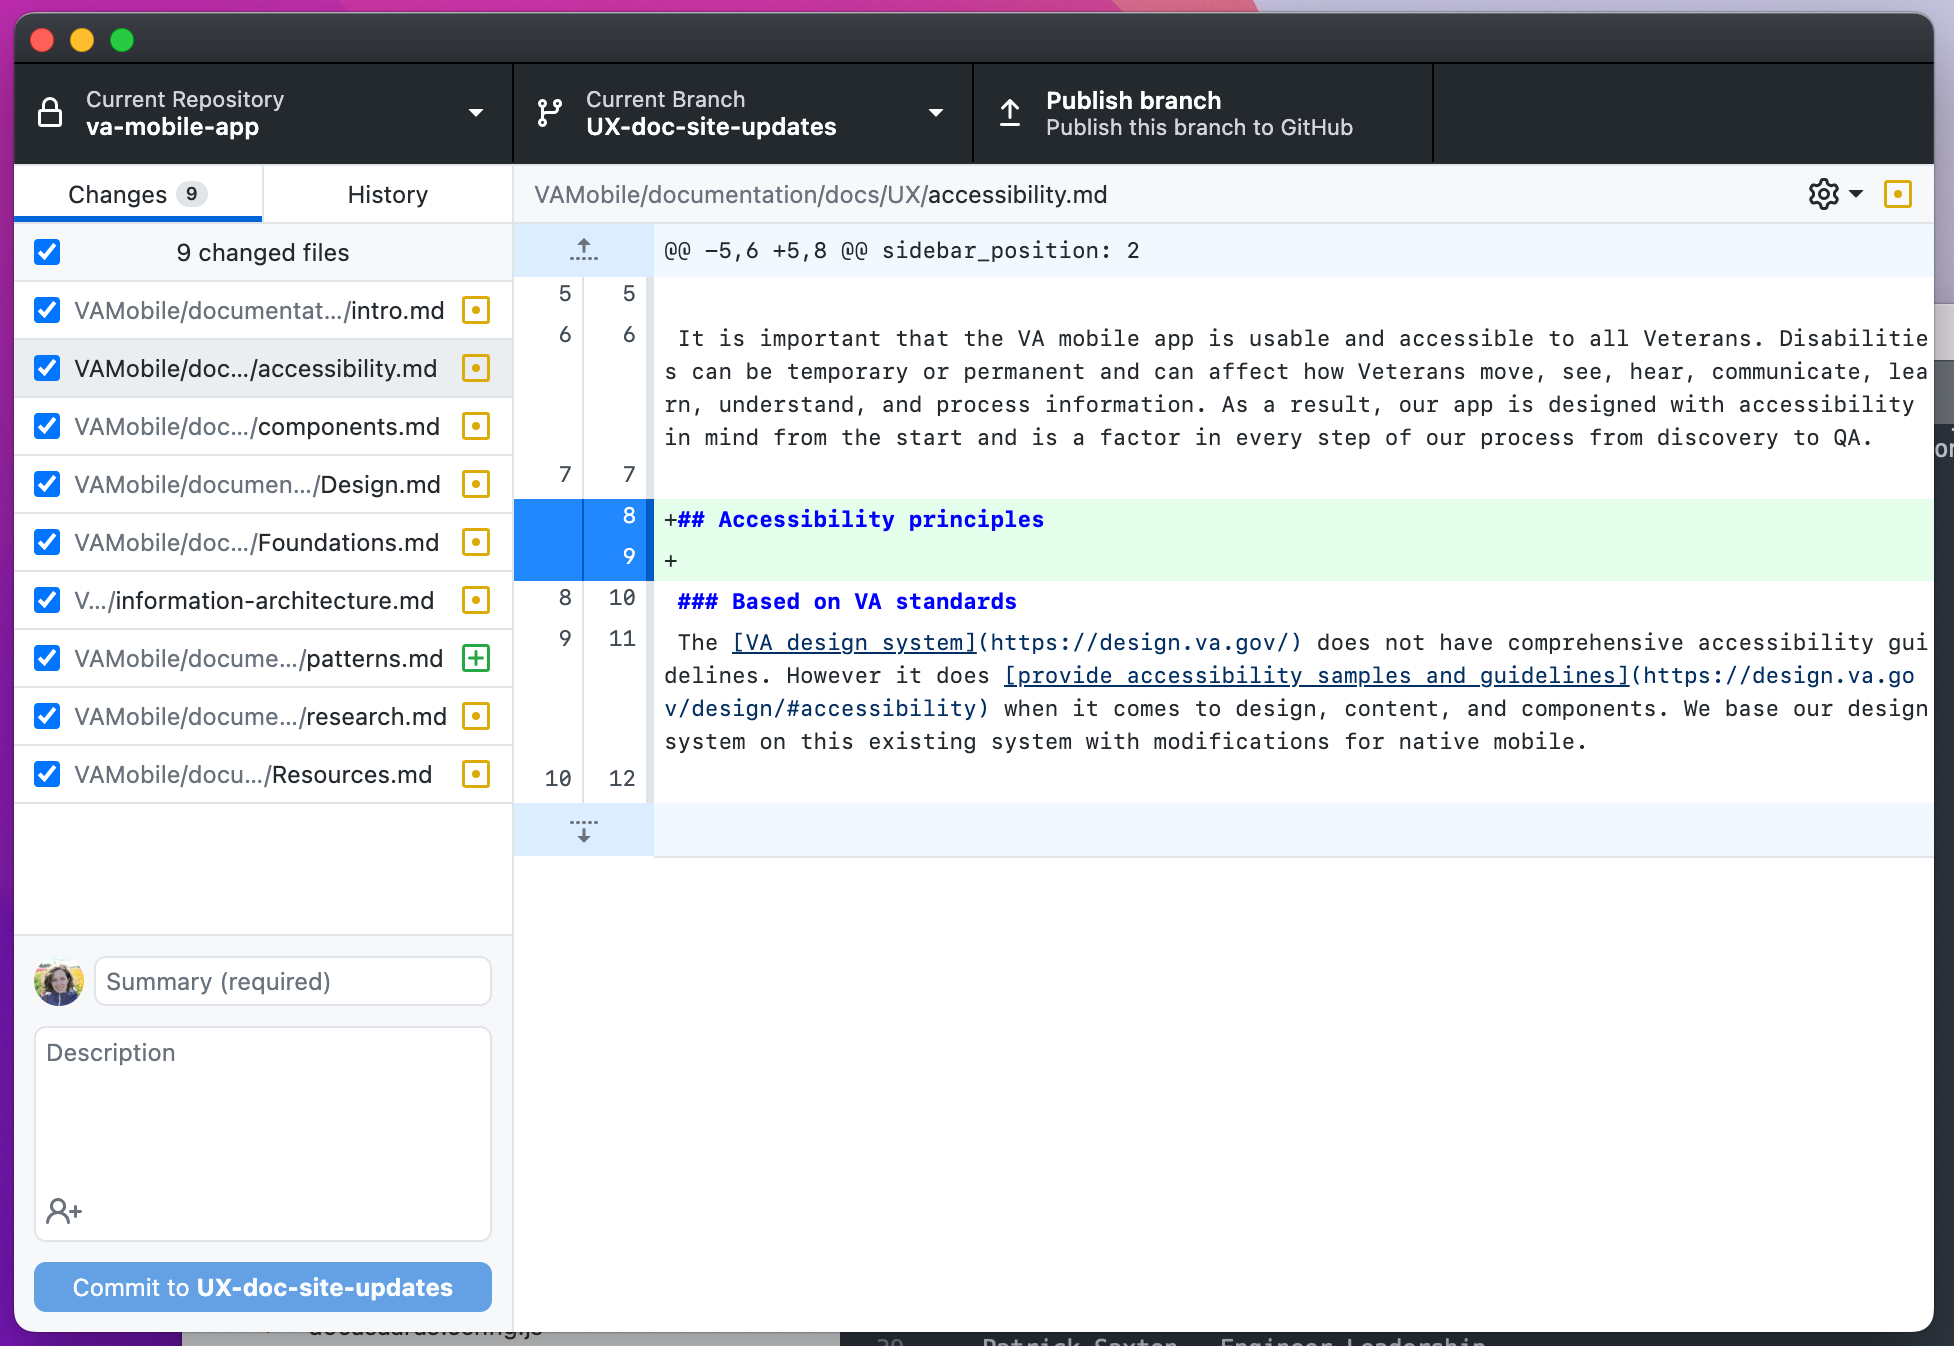
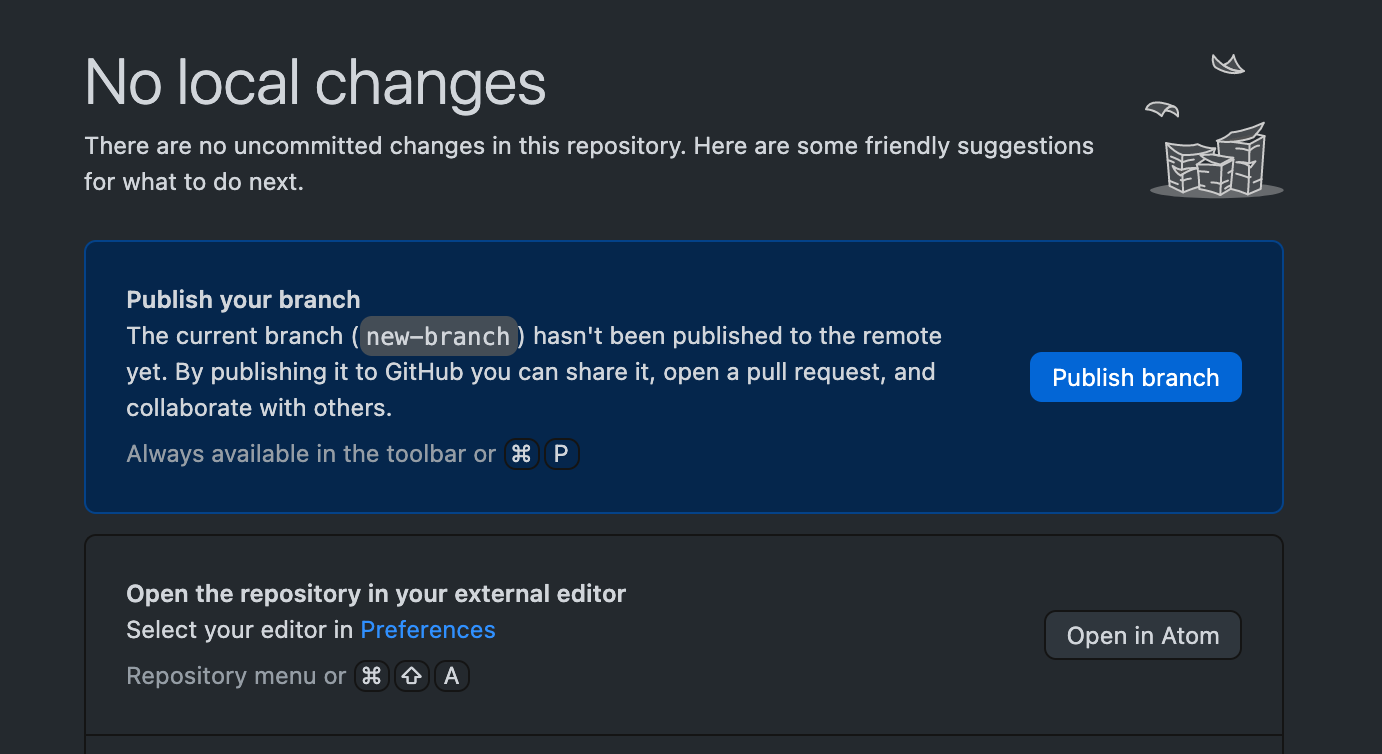
GH Desktop should then show you a screen that says “No local changes” again. If you have more changes or more commits, go ahead and do those now. Once you have all the changes you want to make, you will need to publish your branch so that you can make a pull request.
Publish branch
In order to make a Pull Request and add your changes back onto the base branch, you will need to copy your local branch up onto the GitHub server. To do this, you just need to go to the GH Desktop app, and click either the Publish Branch tab at the top or the Publish Branch button in the Publish your branch area.
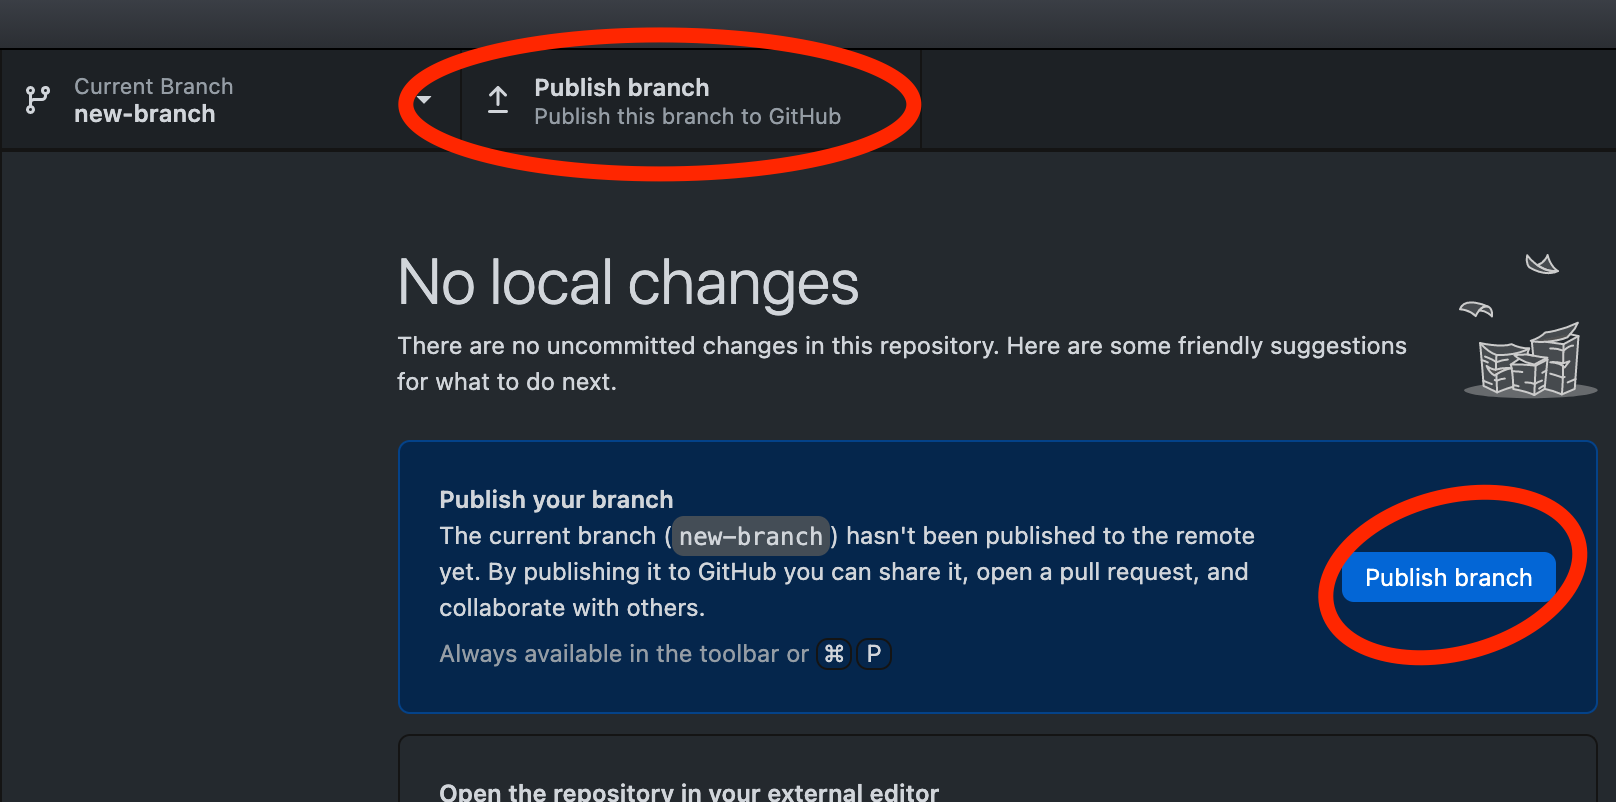
The branch should get pushed up to the repository and you should then see an area to Create Pull Request.
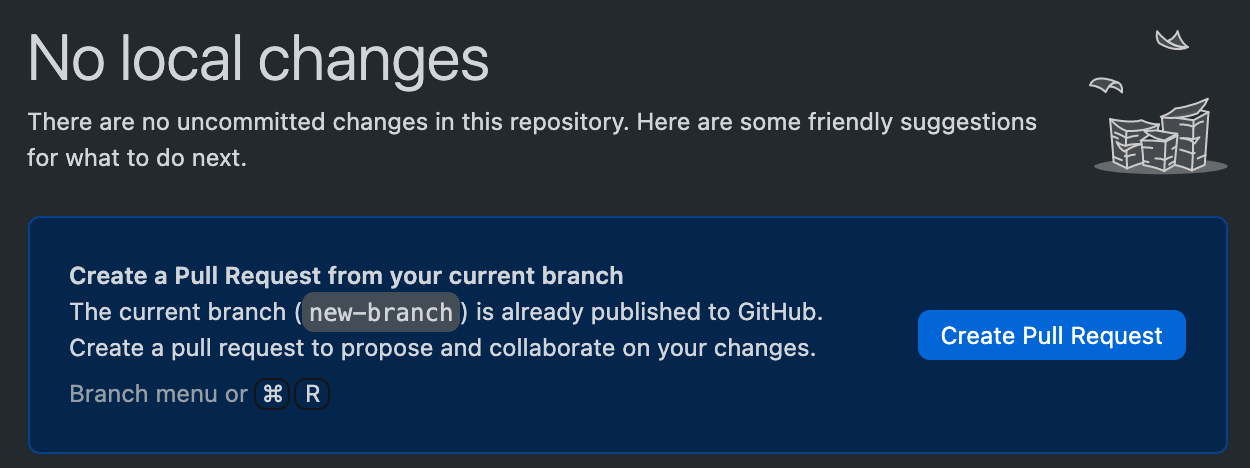
Create a pull request
Click the Create Pull Request button. This should open a browser window that takes you to a Pull Request template in the repository (You can also open the docsite in Github in your browser: https://github.com/department-of-veterans-affairs/va-mobile-app)

Click “Compare & pull request.” You will see this:
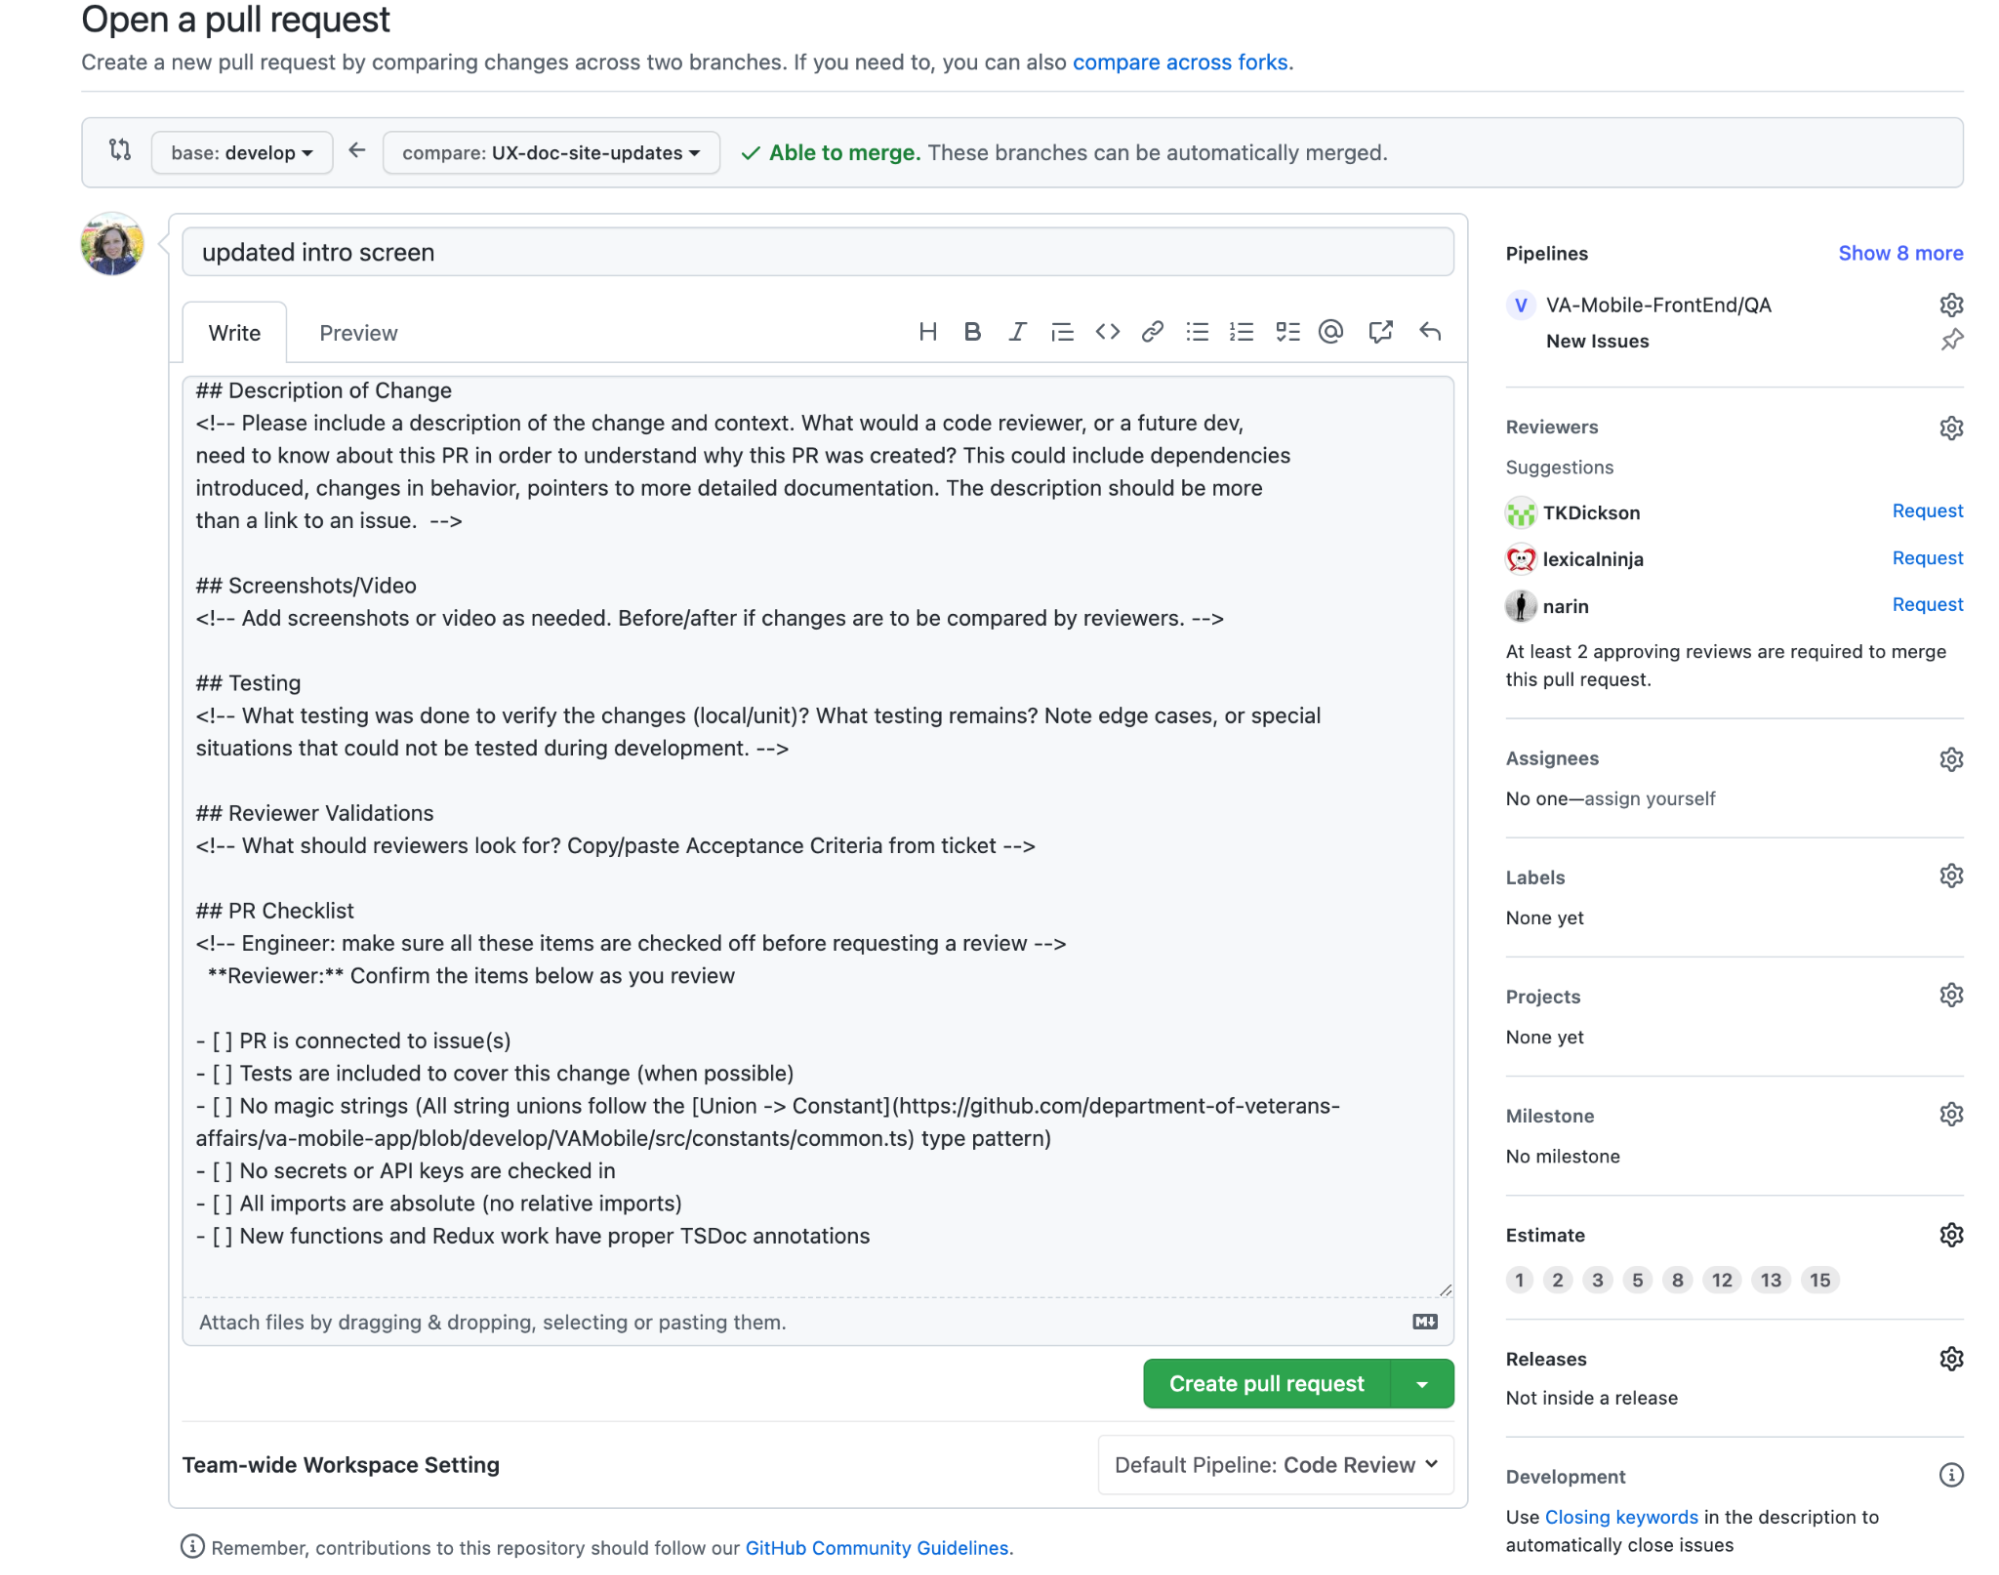
Before you create the pull request, do the following things:
- Make sure the base is set to “develop”
- Github will automatically choose reviewers for you, but you can also choose two people to review your request.
- Scroll down to compare the changes between branches.
If all is well, click Click the green “Create pull request” button.
Your PR has been created!
Wait for it to be reviewed by two team members.
7. Deploying your branch to the doc site
After your pull request receives two approvals, click the green “merge pull request” button at the bottom of the pull request page in Github, followed by the “confirm merge” button in the next step.
Your branch will then begin deploying to the doc site and will be live once the merge is complete.
- To track the status of the build, click “Actions” in Github.
- Next, find and select "[Documentation] Deploy Site" in the left-hand panel.
- The build will have a yellow icon while the branch is deploying to the doc site and a green check icon once it is complete.
Further reading
- How to use GitHub Desktop and Sublime text to make pull requests (General - not specific to Doc site)
- More info on [how to navigate files and folders in Terminal/Command Line](https://www.macworld.com/article/221277/command-line-navigating-files-folders-mac-Terminal/Command Line.html).
- Markdown cheatsheet